In exploring dairy free food options over the past few months, I have been particularly interested in dessert choices. So many store-bought desserts and candies come laden with milk and other dairy products. In early September, I explored cupcake size chocolate peanut butter cups. I botched the first batch by over-cooking the chocolate, but the ones I made the next day were wonderful.
And then I began to think about Halloween. Tricking-or-treating for dairy free children, especially those who don’t like fruity candy, must be a huge frustration. What could I do to make Halloween a night of indulgent chocolately awesomeness for a dairy free child? Then it hit me: a super huge, dairy free, home made chocolate peanut butter cup.
So, without further ado, here is my attempt to recreate the recipe that I used to make my first 10.25″ chocolate peanut butter cup. This recipe is a mish-mash of various recipes that I’ve found online. (Side note: I am a big fan of cast iron pans and highly recommend the great products from the people at Lodge. So versatile and easy to use.)
The Chocolate Peanut Butter Cup Recipe

Prep time: Not too long. 3 independent batches of 15 or so minutes
Why are the prep times on recipes so wildly understated? Hopefully, mine paint a more accurate picture of how long it takes to take these chocolate peanut butter cups.
Equipment
- A 10.25″ seasoned cast iron pan
- Parchment paper
- Some way to grease the bottom side of the parchment paper – just a bit so it sticks to the pan*
* I used vegetable shortening so that my chocolate peanut butter cups would be dairy free and tree-nut free.
Ingredients
Note: If you’re not into dairy free, just swap your chocolate of choice for the dairy free stuff.
- 2 x 22.5 oz. bags of dairy free chocolate chips
- 3 cups or so of peanut butter
- 1.5 cups of powdered sugar
- Some salt – a dash or so
Preparation

(1) Grease the pan just enough so that the parchment paper will stay in place.
(2) Place a long enough piece of parchment paper into the pan so that it becomes a makeshift cupcake paper. (I tucked the extra bits of parchment that stuck out over the top of the pan down around and under the bottom of the pan – so that it would hold the parchment paper in place.)
(3) Melt one of the bags of chocolate chips until it’s liquidy smooth. You can use the microwave. I used a glass mixing bowl on top of a pot of boiling water. This takes about 10 minutes or so.
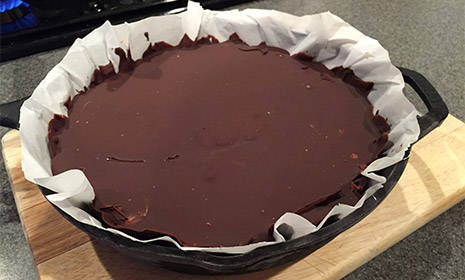
(4) Once melted, pour the chocolate into the parchment-lined pan, being sure to spread it evenly about the bottom.
(5) Using a cooking brush, or even the back of a spoon would work, brush some of the melted chocolate up the sides of the parchment paper. (This makes the sides of the chocolate peanut butter cup.)
(6) Place the pan in the freezer or the fridge so that the chocolate hardens. This can take anywhere from 15 minutes to an hour, depending on where/how you cool the chocolate.
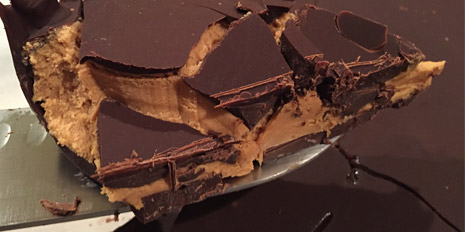
(7) While waiting for the chocolate to harden, mix the peanut butter, powdered sugar and salt. It should look and taste like the consistency of the peanut butter in a Reese’s Peanut Butter Cup.
Note: The basic ratio of peanut butter to powdered sugar is 2:1. If you want to make a smaller chocolate peanut butter cup, adjust accordingly.
(8) After removing the pan from the freezer, spoon the peanut butter filling into the pan. Leave a wee bit of room around the edges of the pan to allow for the subsequent batch of melted chocolate to flow down over it.
(9) Place the pan back in the freezer or refrigerator.
(10) Repeat Step (3), melting the other bag of chocolate chips.
(11) Once the chocolate has melted, remove the pan from the freezer and pour the liquid chocolate over the top of the peanut butter filling. Use the kitchen brush to spread the chocolate around, filling in the gaps and making sure that all the peanut butter filling is covered.
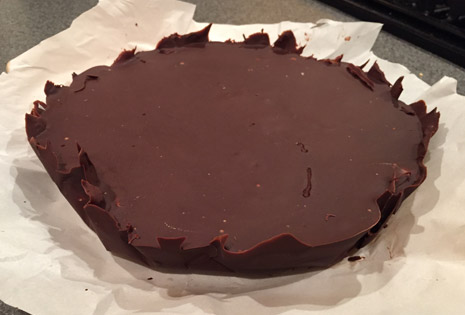
(12) Place the pan back in the freezer until the chocolate is solid.
(13) If you’d like, trim the extra parchment paper above the top rim of the cast iron pan.
Want More Cast Iron?
- You can check out my post about the best all-around cast iron pan.
- Make a sausage and egg breakfast sandwich is a cute little cast iron pan.
- Learn all about cleaning cast iron pans.
- Check out my cast iron pan starter kit.
- Peruse all of the articles in the Cast Iron category.
Contains affiliate links.
